Download Monk
Monk works as a native extension in your IDE. Download here: https://monk.io/downloadsSupported IDEs
Monk works with:- VS Code - Microsoft’s Visual Studio Code
- Cursor - AI-first development platform
- Antigravity - Google AI-first code editor
- Windsurf - AI-powered IDE
- Any VS Code fork - Monk works with any VS Code-compatible editor

Installation Steps
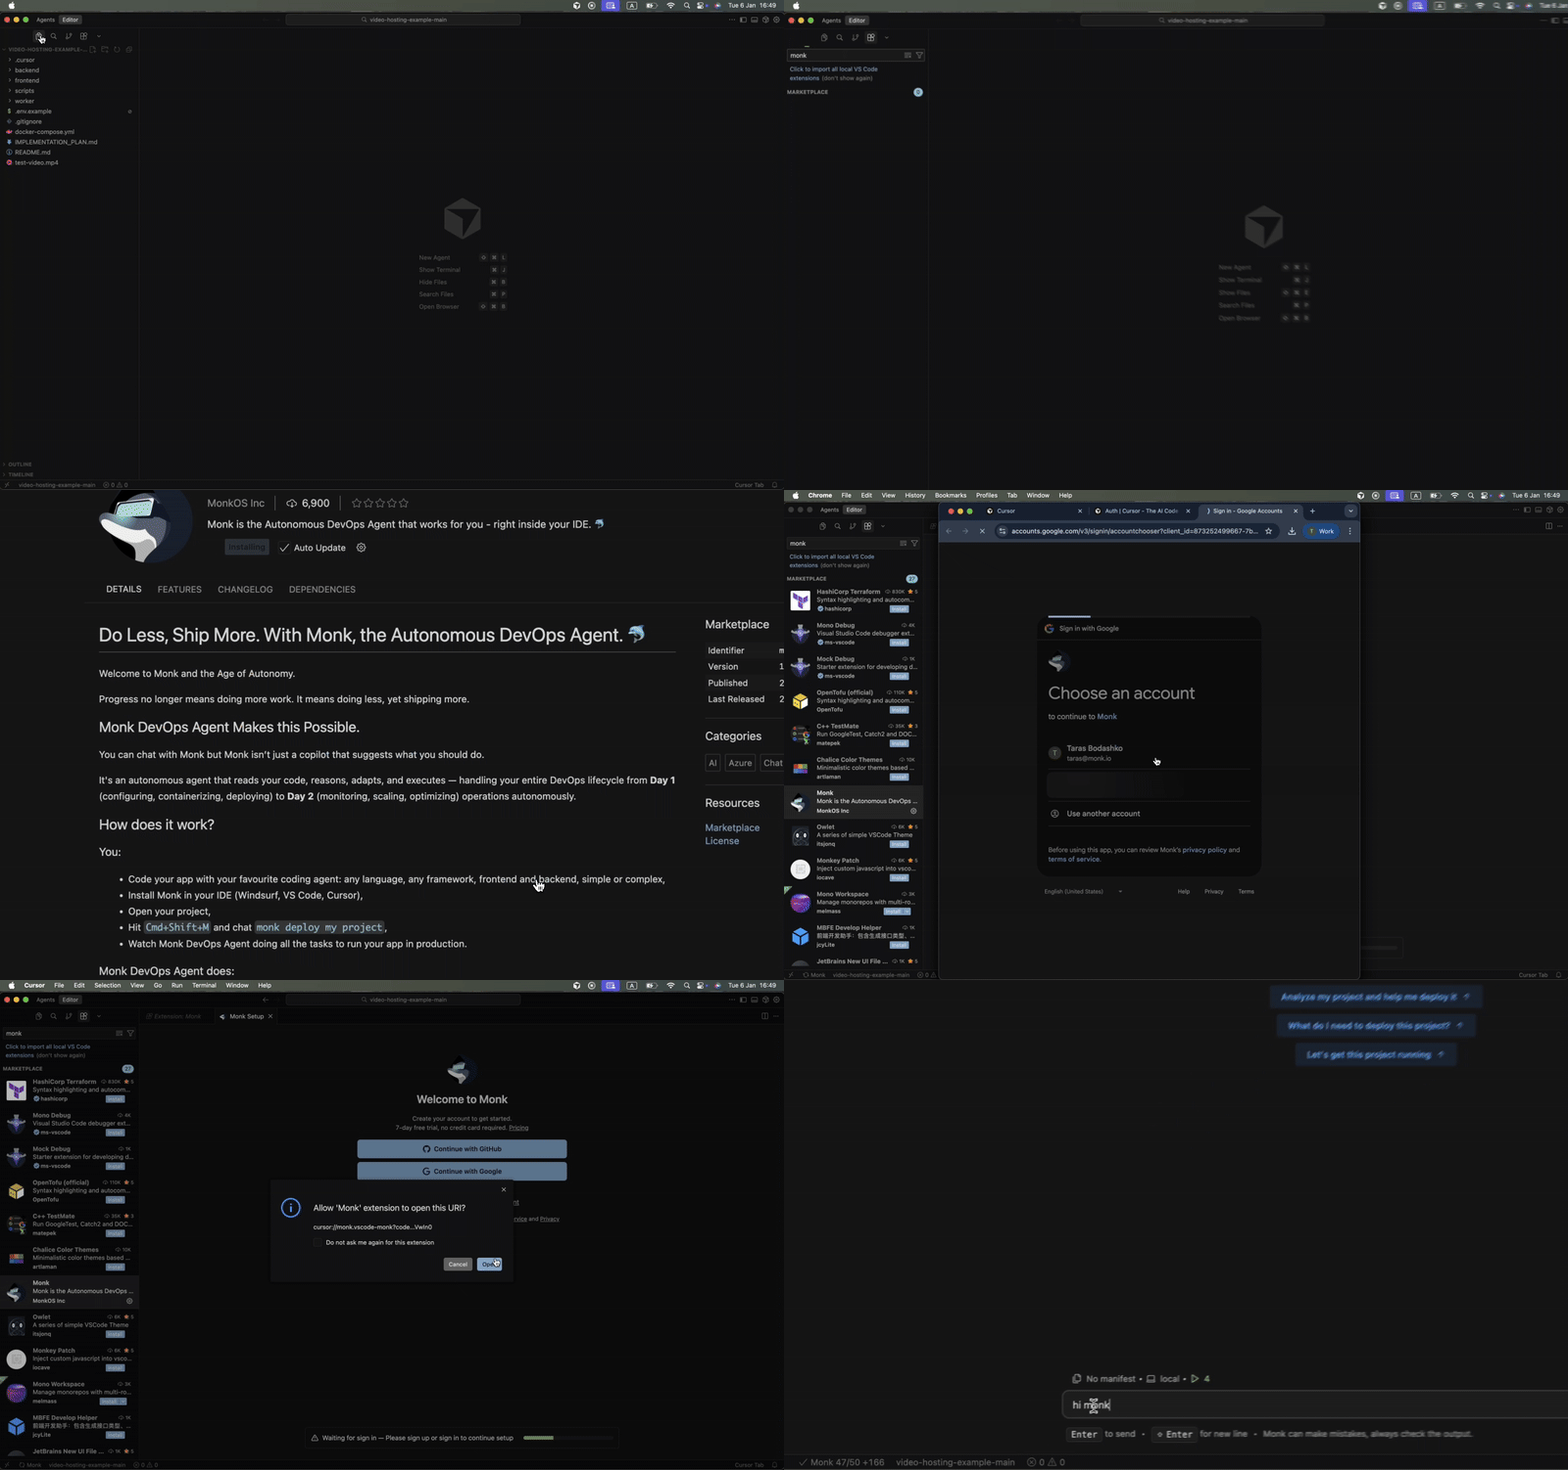
Download the Extension
Get the Monk extension for your IDE from
monk.io/downloads
Install the Extension
Follow your IDE’s extension installation process - usually just click
“Install”
Open a Project
Open a project or workspace folder in your IDE. Monk Extension only activates when a
workspace is open.
Sign In to Monk
The installation wizard will appear. Click to sign up or sign in with your
Monk account.
A browser page will open - complete your authentication there and you’ll be
automatically redirected back to your IDE.
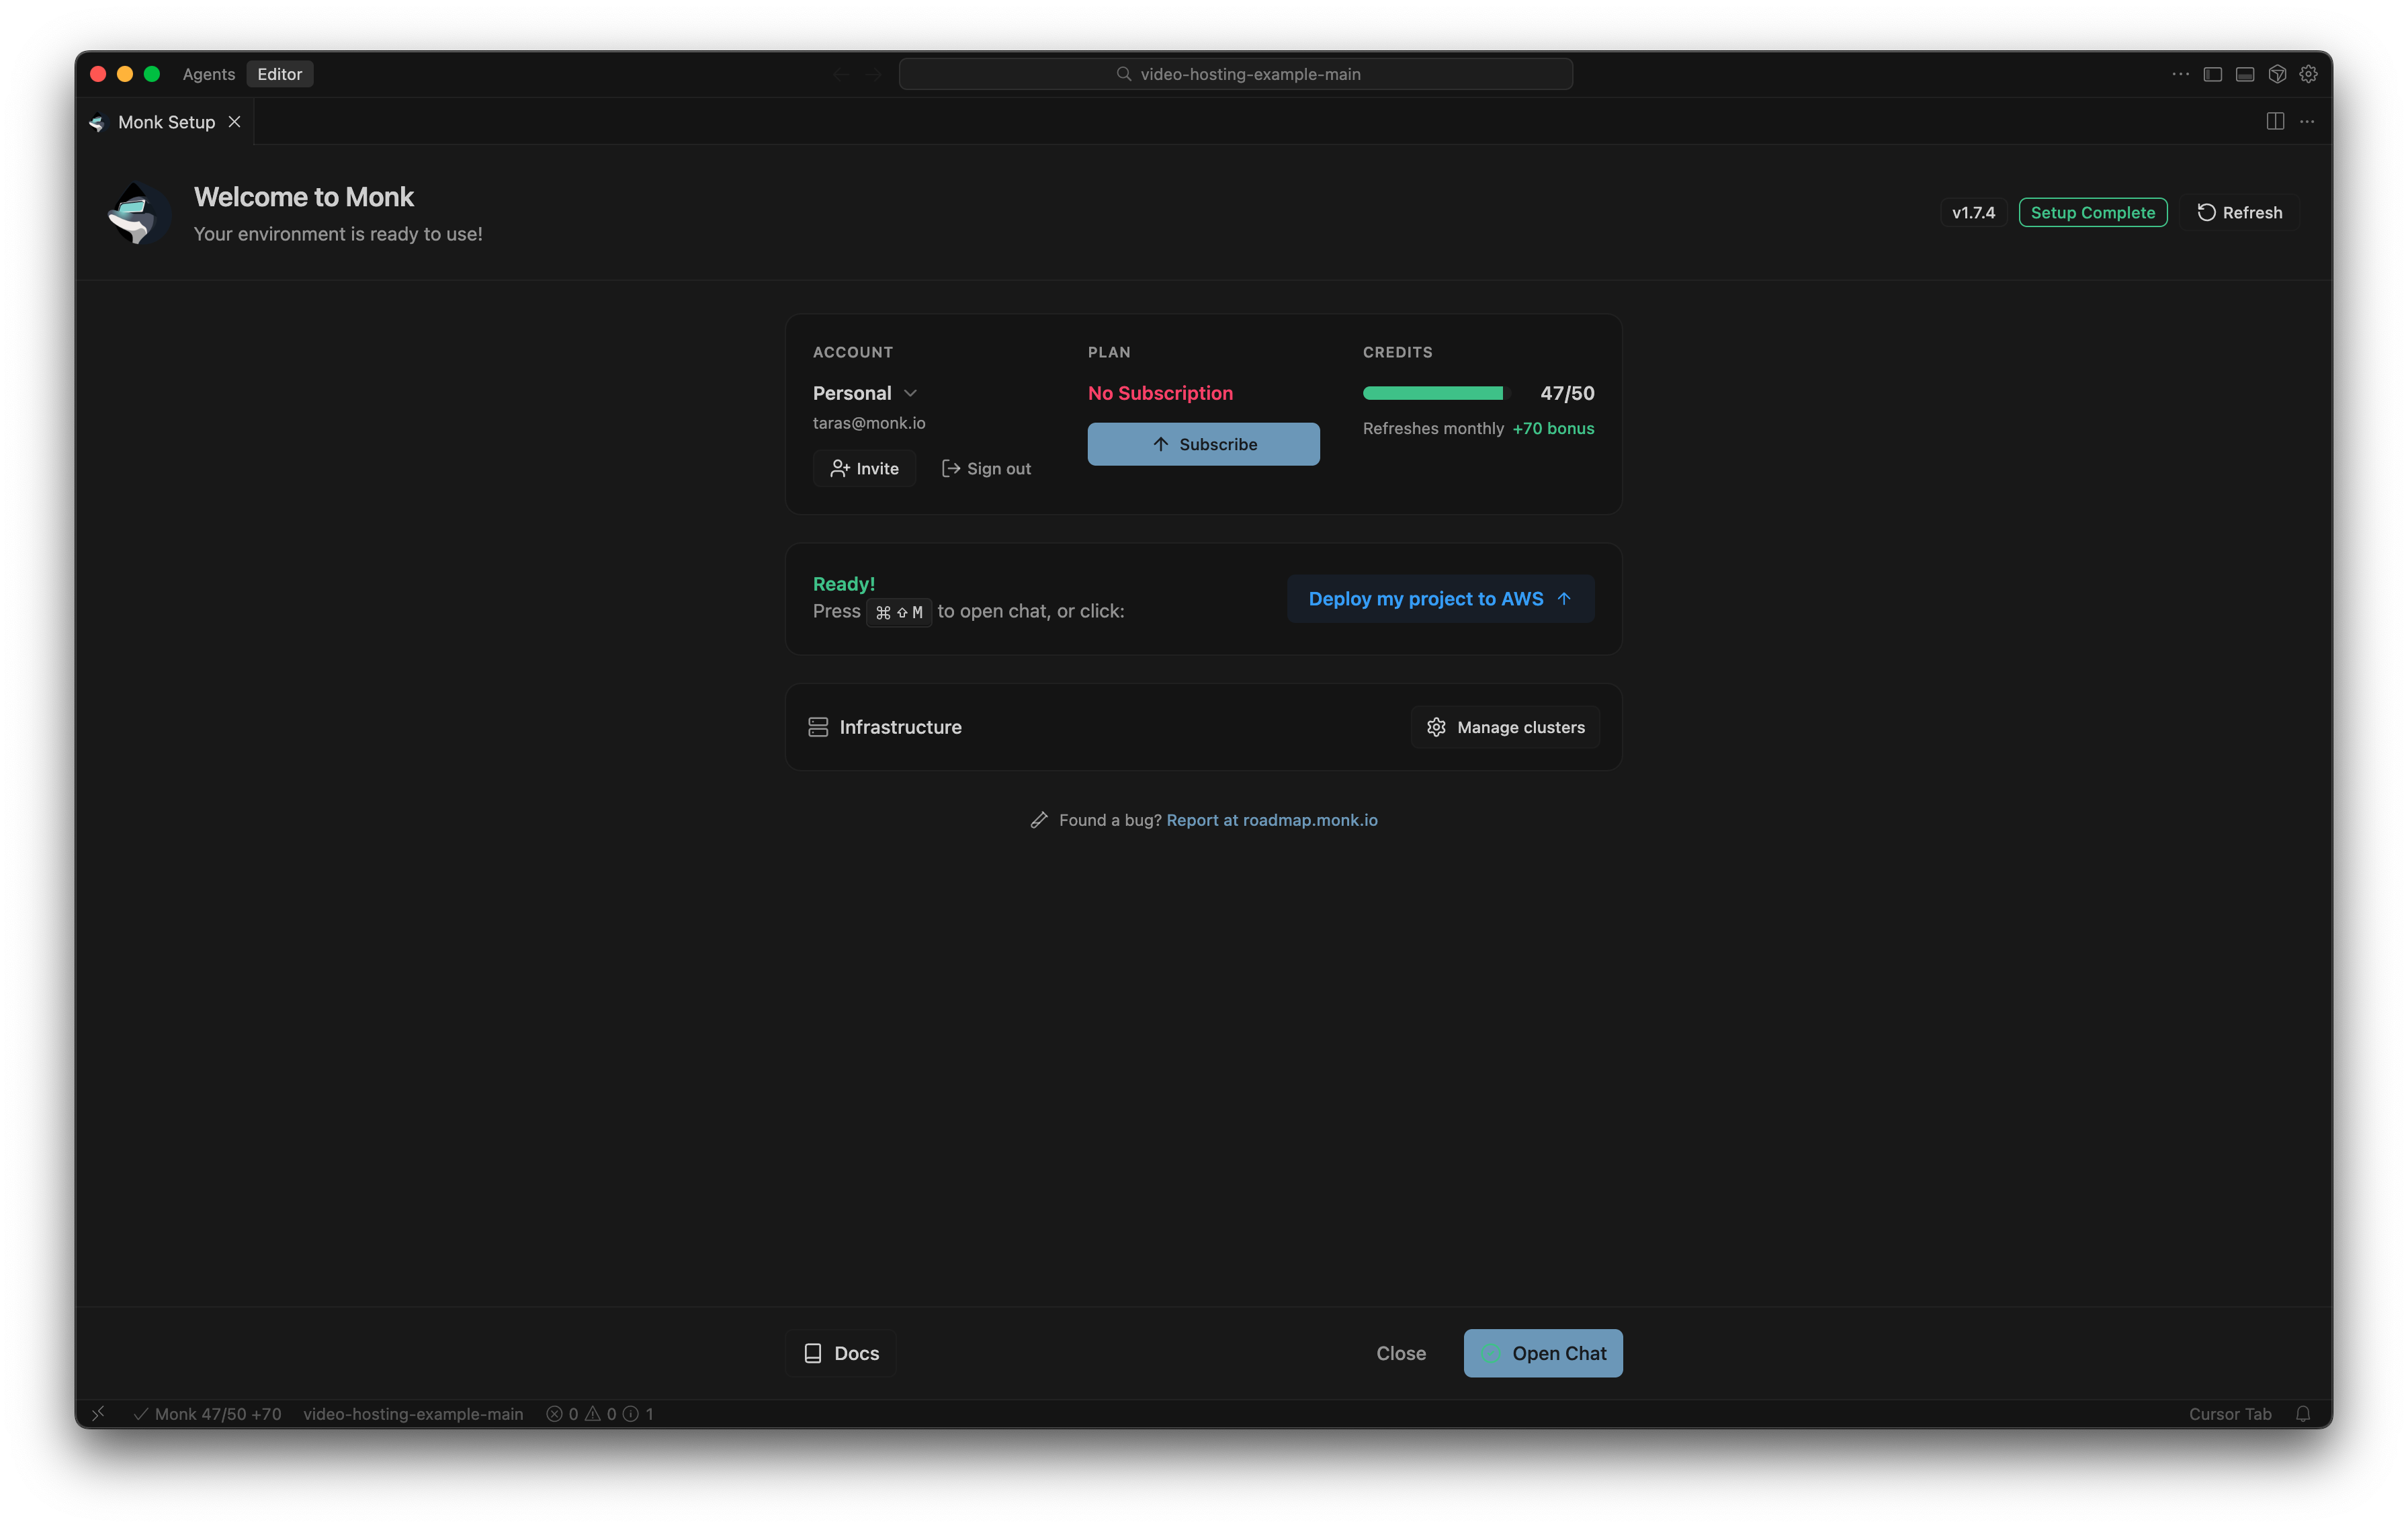
Wait for Dependencies
Monk will install its runtime dependencies automatically. This takes just a minute
or two.

Opening Monk
After installation, access Monk from your IDE: Click the Monk icon in your IDE’s status bar Or use keyboard shortcuts:- Mac:
Cmd+Shift+M - Windows/Linux:
Ctrl+Shift+M
What You’ll See
Monk provides two main views in your IDE: Chat Window:- Natural language interface to talk to Monk
- See deployment progress
- Get answers and explanations
- Track what Monk is working on
- View completed tasks
- Approve pending actions
- Shows errors log in case of process failure
System Requirements
Monk works on:- macOS (Intel and Apple Silicon)
- Windows (10 and 11)
- Linux (most distributions)
Troubleshooting Installation
Status Panel Detected Issues
If something goes wrong during installation, Monk’s status panel will automatically appear and show you what needs attention. What to do:- The status panel highlights any problems with red or yellow indicators
- Click on the affected item to see details
- Follow the instructions provided
- Monk will guide you through fixing the issue
- Missing system dependencies
- Network connectivity problems
- Permission issues
- Runtime initialization failures
Still Having Issues?
If the status panel doesn’t resolve your issue:- Ask Monk directly - Open the chat (
Cmd+Shift+M) and describe the problem - Report the issue - Use the bug report button in the Monk panel
- Check the docs - Visit Getting Help & Support for all support channels

