> ## Documentation Index
> Fetch the complete documentation index at: https://docs.monk.io/llms.txt
> Use this file to discover all available pages before exploring further.
# Install Monk
> Install Monk in your IDE
Monk runs as a native extension in VS Code, Cursor, Windsurf, Antigravity, and any VS Code-compatible editor. The whole process takes about two minutes — the Monk chat window walks you through everything.
Want Monk without the IDE extension? Claude Code, Codex, and Cursor can install the [Monk agent plugin](/getting-started/agent-plugin-installation) directly.
## Download
Click your IDE above to open the extension page directly, then hit **Install**. Using a different VS Code fork? Search for **"Monk"** in your IDE's extension marketplace or download from [monk.io/downloads](https://monk.io/downloads).
## One-Time Setup
When you download the extension, the Monk chat window opens and guides you through the one-time setup. Follow the steps below.
Click **Sign up** to start your 5-day free trial — no credit card required. A browser window opens where you can sign up with Google, GitHub, or email.
If you pick the **Email** method, check your inbox and confirm your email address before signing in.
After signup is complete you are returned to your IDE automatically. If the redirect does not work, click the **Return to…** button in the browser.
Already have an account? Click **Sign in** instead.
The Monk runtime installs automatically in the background. You can see the progress in the chat window.
If the install does not complete, you can:
* **Retry** by clicking the Retry button
* **Report a bug** by clicking Report
Open a folder containing a project you would like to deploy. Monk only activates when a workspace is open. If you already have a project open, this step completes automatically.
The Monk MCP server is enabled automatically — no action needed.
Follow the link in the setup screen to the setup guide for your IDE. This is the only step that requires configuration on the agent side.
Once everything is green, tell your agent to deploy your project with Monk.
 You can get back to the setup screen at any time from the Monk icon in the bottom-left of your IDE's status bar.
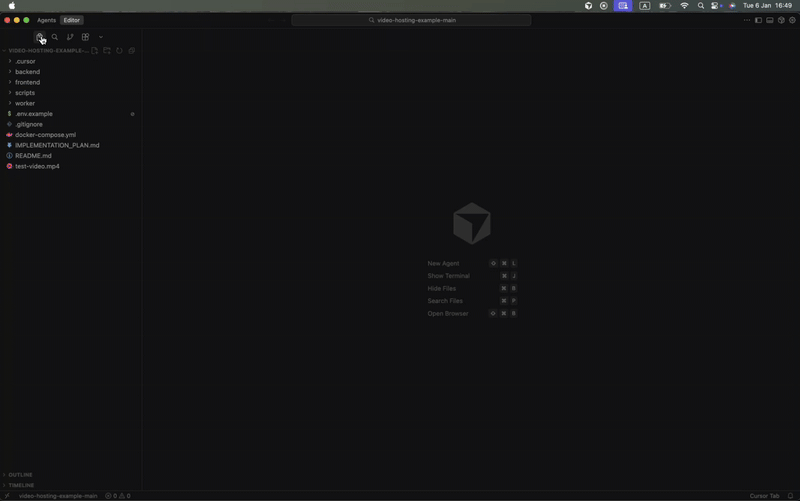
## Open Monk
Click the Monk icon in your IDE's status bar, or use the keyboard shortcut:
* **Mac:** `Cmd+Shift+M`
* **Windows/Linux:** `Ctrl+Shift+M`
You can also search **"Monk"** in the command palette (`Cmd+Shift+P` / `Ctrl+Shift+P`).
## System Requirements
Monk works on macOS (Intel and Apple Silicon), Windows 10+, and most Linux distributions. The installer handles all dependencies automatically — but here's what happens on each platform, and what you might need if the auto-install can't complete a step.
**What Monk installs for you:**
* Xcode Command Line Tools (if missing or broken after an OS upgrade)
* [Homebrew](https://brew.sh) (if not already installed) — runs in a terminal so you can enter your password when prompted
* Monk CLI and daemon via `brew install monk-io/monk/monk`
* Podman container runtime (managed automatically)
**Prerequisites:**
* macOS 12 Monterey or later (Intel or Apple Silicon)
* Administrator access — Homebrew and Xcode CLT require your password during install
**Good to know:**
* If you recently upgraded macOS, the installer detects stale Command Line Tools and fixes them automatically
* The Homebrew install runs in a visible VS Code terminal — you can see exactly what's happening
* If another Podman machine is already running, Monk asks you to stop it first
**What Monk installs for you:**
* WSL (Windows Subsystem for Linux) — opens the Microsoft Store page if not installed
* An Ubuntu distribution inside WSL
* Monk CLI and daemon inside the WSL environment
* VS Code UNC host permissions for seamless file access
**Prerequisites:**
* Windows 10 version 2004+ or Windows 11
* WSL 2 capable hardware (most modern PCs)
* Administrator access for WSL installation
**Good to know:**
* Monk creates a dedicated "Ubuntu-Monk" WSL distribution to avoid conflicts with your existing Linux setups
* After WSL and UNC permissions are configured, a one-time IDE restart is required
* All Monk runtime components (CLI, daemon) run inside WSL, not on Windows directly
**What Monk installs for you:**
* Monk CLI and daemon via your system package manager (`apt` or `dnf`)
* Monk's signed package repository
* A systemd service override for the daemon socket
**Prerequisites:**
* A distribution with `apt` (Debian, Ubuntu) or `dnf` (Fedora, RHEL)
* `systemd` for daemon management
* `sudo` access — the package install and systemd setup require elevated permissions
**Good to know:**
* The installer adds the Monk apt/dnf repository with a GPG-signed key
* If you are running a distribution without `apt` or `dnf`, see the [manual install instructions](https://monk.io/downloads)
## Next Steps
Use Monk from Claude Code, Gemini, Codex, Cursor, and other coding agents
Direct plugin install for Claude Code, Codex, and Cursor
Deploy your first application in minutes
Common installation issues and how to fix them
You can get back to the setup screen at any time from the Monk icon in the bottom-left of your IDE's status bar.
## Open Monk
Click the Monk icon in your IDE's status bar, or use the keyboard shortcut:
* **Mac:** `Cmd+Shift+M`
* **Windows/Linux:** `Ctrl+Shift+M`
You can also search **"Monk"** in the command palette (`Cmd+Shift+P` / `Ctrl+Shift+P`).
## System Requirements
Monk works on macOS (Intel and Apple Silicon), Windows 10+, and most Linux distributions. The installer handles all dependencies automatically — but here's what happens on each platform, and what you might need if the auto-install can't complete a step.
**What Monk installs for you:**
* Xcode Command Line Tools (if missing or broken after an OS upgrade)
* [Homebrew](https://brew.sh) (if not already installed) — runs in a terminal so you can enter your password when prompted
* Monk CLI and daemon via `brew install monk-io/monk/monk`
* Podman container runtime (managed automatically)
**Prerequisites:**
* macOS 12 Monterey or later (Intel or Apple Silicon)
* Administrator access — Homebrew and Xcode CLT require your password during install
**Good to know:**
* If you recently upgraded macOS, the installer detects stale Command Line Tools and fixes them automatically
* The Homebrew install runs in a visible VS Code terminal — you can see exactly what's happening
* If another Podman machine is already running, Monk asks you to stop it first
**What Monk installs for you:**
* WSL (Windows Subsystem for Linux) — opens the Microsoft Store page if not installed
* An Ubuntu distribution inside WSL
* Monk CLI and daemon inside the WSL environment
* VS Code UNC host permissions for seamless file access
**Prerequisites:**
* Windows 10 version 2004+ or Windows 11
* WSL 2 capable hardware (most modern PCs)
* Administrator access for WSL installation
**Good to know:**
* Monk creates a dedicated "Ubuntu-Monk" WSL distribution to avoid conflicts with your existing Linux setups
* After WSL and UNC permissions are configured, a one-time IDE restart is required
* All Monk runtime components (CLI, daemon) run inside WSL, not on Windows directly
**What Monk installs for you:**
* Monk CLI and daemon via your system package manager (`apt` or `dnf`)
* Monk's signed package repository
* A systemd service override for the daemon socket
**Prerequisites:**
* A distribution with `apt` (Debian, Ubuntu) or `dnf` (Fedora, RHEL)
* `systemd` for daemon management
* `sudo` access — the package install and systemd setup require elevated permissions
**Good to know:**
* The installer adds the Monk apt/dnf repository with a GPG-signed key
* If you are running a distribution without `apt` or `dnf`, see the [manual install instructions](https://monk.io/downloads)
## Next Steps
Use Monk from Claude Code, Gemini, Codex, Cursor, and other coding agents
Direct plugin install for Claude Code, Codex, and Cursor
Deploy your first application in minutes
Common installation issues and how to fix them